Python - 基础
1名字:Python,蟒蛇
2.设计者:吉多·范罗苏姆(Guido van Rossum) (荷兰人),俗称“龟叔”
3.发行时间:1991年
4.介绍:
Python 是一款易于学习且功能强大的编程语言,它是一种动态的、面向对象的解释型编程语言,最初被设计用于编写自动化脚本(shell),随着版本的不断更新和语言新功能的添加,越来越多被用于独立的、大型项目的开发。现在 Python 是由一个核心开发团队在维护,Guido van Rossum 仍然占据着至关重要的作用,指导其进展。
5.设计哲学:
“优雅”、“明确”、“简单”
6.命名来源:
取自英国20世纪70年代首播的电视喜剧《蒙提.派森干的飞行马戏团》(Monty Python's Flying Circus)
7.应用领域:
软件开发、科学计算、自动化运维、云计算、Web开发、网络爬虫、数据分析、人工智能
8.发展历程:
自从2004年以后,python的使用率呈线性增长。Python 2于2000年10月16日发布,稳定版本是Python 2.7。Python 3于2008年12月3日发布,不完全兼容Python 2。
9.语言特点:
简单、易学、开源、解释型、可移植、面向对象、可扩展、丰富基础库
Python 具有非常庞大完善的基础代码库,包括有网络、文件、GUI、数据库、文本等, 它们被称作 Python 自备电池(Batteries Included) 。除了大量的内置库外,Python 还有大量的第三方库。
10.缺点:
缺点:运行速度慢,因为Python是解释型语言,代码在执行时会一行一行地翻译为CPU能理解的机器码。不像C语言在编译成功后就是CPU能执行的机器码。
一、环境安装
1.windowns
Python :https://www.python.org/
Pycharm : https://www.jetbrains.com/pycharm/
注意安装Python 记得勾选
Add Pyton ... to PATH来将Python添加到环境变量中
控制台中输入 Python 以检测是否安装成功
C:\Users\ITSoftware>python
Python 3.7.0 (v3.7.0:1bf9cc5093, Jun 27 2018, 04:59:51) [MSC v.1914 64 bit (AMD64)] on win32
Type "help", "copyright", "credits" or "license" for more information.
>>> print("test")
test
>>>
2.Linux
(1)源码编译安装
第一步:安装依赖
yum install -y openssl-devel bzip2-devel expat-devel gdbm-devel readline-devel sqlite-devel libffi-devel wget第二步:下载Python软件包
下载地址:https://www.python.org/downloads/source/
wget https://www.python.org/ftp/python/3.7.5/Python-3.7.5.tgz
tar -xvf Python-3.7.5.tar.xz
cd Python-3.7.5
第三步:配置、编译、安装
./configure --prefix=/usr/local/python3 && make && make install第四步:配置环境变量
echo 'PATH=/usr/local/python3/bin:$PATH' >> /etc/profile
source /etc/profile
验证
python3 --version
pip3 --version
(2)yum安装
yum install epel-release
yum install python3
yum install python3-devel
(3)pyenv
项目地址:https://github.com/pyenv/pyenv
Python 多版本管理工具
当服务器上存在不同版本的python项目时,使用pyenv可以做到多版本间的隔离使用
安装依赖
yum install -y openssl-devel bzip2-devel expat-devel gdbm-devel readline-devel sqlite-devel libffi-devel wget安装
#1.下载
git clone https://github.com/pyenv/pyenv.git ~/.pyenv

#2、配置环境变量
echo 'export PYENV_ROOT="$HOME/.pyenv"' >> /etc/profile
echo 'export PATH="$PYENV_ROOT/bin:$PATH"' >> /etc/profile
source /etc/profile
echo 'eval "$(pyenv init -)"' >> ~/.bash_profile
使用
#1.列出所有的python当前可下载使用版本
pyenv install --list
#2.查看已经安装的版本
pyenv versions
#3.安装python
#因为网络原因,下载比较慢,可以将要下载好的源码包放到到: ~/.pyenv/cache/
#安装目录为: ~/.pyenv/versions/
pyenv install 3.8.0 -v
环境变量切换
#配置当前用户的系统使用的python版本
pyenv global <version>
#配置当前shell的python版本,退出shell则失效 pyenv shell --unset退出
pyenv shell <version>
#配置所在项目(目录)的python版本,进入目录进行配置
pyenv local <version>3.配置pip国内源
- Linux
#mkdir -p ~/.pip
#~/.pip/pip.conf
[global]
index-url = https://mirrors.aliyun.com/pypi/simple/
[install]
trusted-host=mirrors.aliyun.com- Windows
#创建文件
C:\Users\用户名\AppData\Roaming\pip\pip.ini
#文件内容
[global]
index-url = https://mirrors.aliyun.com/pypi/simple/
[install]
trusted-host=mirrors.aliyun.com
二、基础知识
Python的设计目标之一是让代码具有高度的可阅读性。
Python利用缩进表示语句块的开始和退出(Off-side规则)。
代码规范PEP:https://www.python.org/dev/peps/pep-0008/
代码规范PEP:http://zh-google-styleguide.readthedocs.io/en/latest/google-python-styleguide/python_style_rules/
2.1 输入输出
- 输出
print(""); 也可以使用print("a","b","c")将会输出“a b c”,逗号将会被替换为一个空格
>>> print("abc")
abc
>>> print("a","b","c")
a b c
格式化输出
name,age="Tiger",21
print("My name is " + name + ". I am " + str(age) + " years old.")
print("My name is %s. I am %s years old."%(name,age))
print("My name is {}. I am {} years old.".format(name,age))
VT100 控制码
print("\033[31m hello world\033[0m")
print("\033[32m hello world\033[0m")
print("\033[33m hello world\033[0m")
print("\033[34m hello world\033[0m")
print("\033[35m hello world\033[0m")
print("\033[36m hello world\033[0m")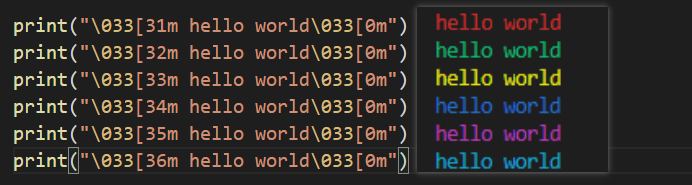
- 输入
input(); 带提示的输入input("Please ...")
>>> name=input("Please input your name: ")
Please input your name: Tiger
>>> print(name)
Tiger
2.2 注释
单行注释:
#多行注释:
'''或者"""
# comments

'''
comments.....
'''
2.3变量
变量名只能是字母、数字或下划线的任意组合
变量名的第一个字符不能是数字
变量名要有见名知义的效果(驼峰式、下划线)
变量名区分大小写
变量不需要显示声明数据类型,这称为动态语言
不允许不同类型相加,这称为强类型语言
每一个变量在使用前都必须赋值
num=123
str="ABC"
b=True
list=[1,2,3,4]
tuple=(1,2,3,4)
dict={"a":1,"b":2,"c":3}
set={1,2,3,4}

print(type(num))
print(type(str))
print(type(b))
print(type(list))
print(type(tuple))
print(type(dict))
print(type(set))
交换变量值
a=1
b=2
print(a,b)
a,b=b,a
print(a,b)
2.4 常量
通常使用全部大写变量名的方式表示常量
但是实际上Python中并没有任何机制来保证常量不可变更,只是一个提示作用
三、运算符
算数运算符:+、 - 、* 、/ 、// 、** 、%
>>> print(10/3)
3.3333333333333335
>>> print(10//3)
3
>>> print(2**4)
16赋值运算符:= 、+= 、-= 、*= 、/= 、//= 、**= 、%=
比较运算符:== 、!= 、> 、< 、>= 、<=
逻辑运算符:and、or、not
运算符的优先级:算数>比较>逻辑>赋值
四、流程控制
1.判断语句
if condition1:
    command...
elif condition2:
    command...
else:
    command...
注意
#总结:条件为None或者0都是Flase,其他的都是True
if 0:
    print(0)
if 1:
    print(1)
if 2:
    print(2)
if 3:
    print(3)
if None:
    print("None")

#结果
#1
#2
#3
2.循环语句
continue:跳出本次循环,直接执行下一次循环
break:退出循环
exit(): 退出python程序
while
while condition:
    command.....
for
for i in range(5):
    print(i)
 #输出结果: 0 1 2 3 4

for i in range(1, 5):
    print(i)
 #输出结果: 1 2 3 4

for i in range(1, 5, 2): #第三个参数为步长
    print(i)
 #输出结果: 1 3
案例
案例:0-100间偶数和
#while
num=0
sum=0
while num<=100:
    sum+=num
    num+=2
print(sum)

#for
sum2=0
for i in range(0,101,2):
    sum2+=i
print(sum2)
案例:打印1-10之间偶数
n = 0
while n < 10:
    n += 1
    if n % 2 == 0:
        continue
    print(n)
案例:九九乘法表
#for
for i in range(0,10):
    for j in range(1,i+1):
        print("{}*{} = {} ".format(j,i,i*j),end=" ")
    print("\n")

#while
i=0
while i<9:
    i+=1
    j=0
    while j<i:
        j+=1
        print("{}*{} = {} ".format(j,i,i*j),end=" ")
    print("\n")
案例:三元表达式
name = "Tiger"
age=22
gender="male"

if gender=="male":
    print(name,"sir" if age>=18 else "boy")
else:
    print(name, "lady" if age>=18 else "girl")
五、异常
num = input("请输入一个整数:")
try:
    num = int(num)
except Exception e:
    print("你输的不是整数!")
    print(e)
    exit()
print(num)
六、注意事项
- 代码中每一行的第一个字符前不能有任何空格或制表格
- Python程序是大小写敏感的
Python使用缩进来组织代码块,四个空格
更多可参考:
0.官方文档
2.《简明 Python 教程 》